1. 准备本地环境
1.1 安装 Git
在 Windows 上安装 Git 有几种方法:
- 下载并安装官方版本,访问 Git 官方网站。
- 这是一个名为 Git for Windows 的项目,也称为 msysGit,更多信息请访问 http://msysgit.github.io/。
1.2 安装 Node.js
根据操作系统选择适合的 Node.js 版本:
- 访问 Node.js 官方网站,下载适合你系统的安装包,例如
node-v20.15.3-x64.msi。 - 双击安装包,按照提示进行安装,使用默认选项即可。
- 安装完成后,在命令行窗口输入
node -v,检查 Node.js 是否成功安装(例如显示 v20.15.3)。
2. 准备 GitHub
注册 GitHub 账户(大家几乎都有了~略过)。
3. 连接 GitHub
3.1 在本地创建一个项目文件夹,例如 hexo。
- 在文件夹空白处右键,选择
Open Git Bash here打开 Git 终端。

3.2 配置 GitHub 账户信息:
git config --global user.name "你的 GitHub 用户名"
git config --global user.email "你的 GitHub 邮箱"
3.3 创建 SSH 密钥:
ssh-keygen -t rsa -C "你的 GitHub 邮箱"注:
- 什么都不用管,一路回车就行。
- 如果之前已经创建过了密钥,会出现
id_rsa already exists. Overwrite (y/n)?此时就需要选择y进行覆盖。
3.4 上传本地密钥至 GitHub:
- 打开
C:\Users\用户名\.ssh目录(勾选显示,“显示隐藏文件”)。 - 复制并上传生成的公钥
id_rsa.pub到 GitHub
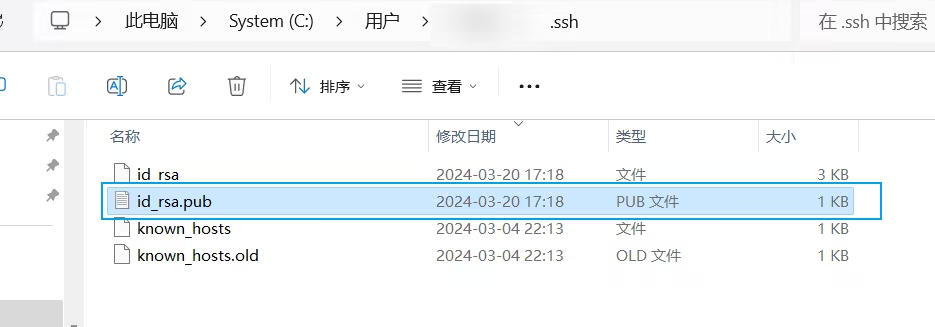
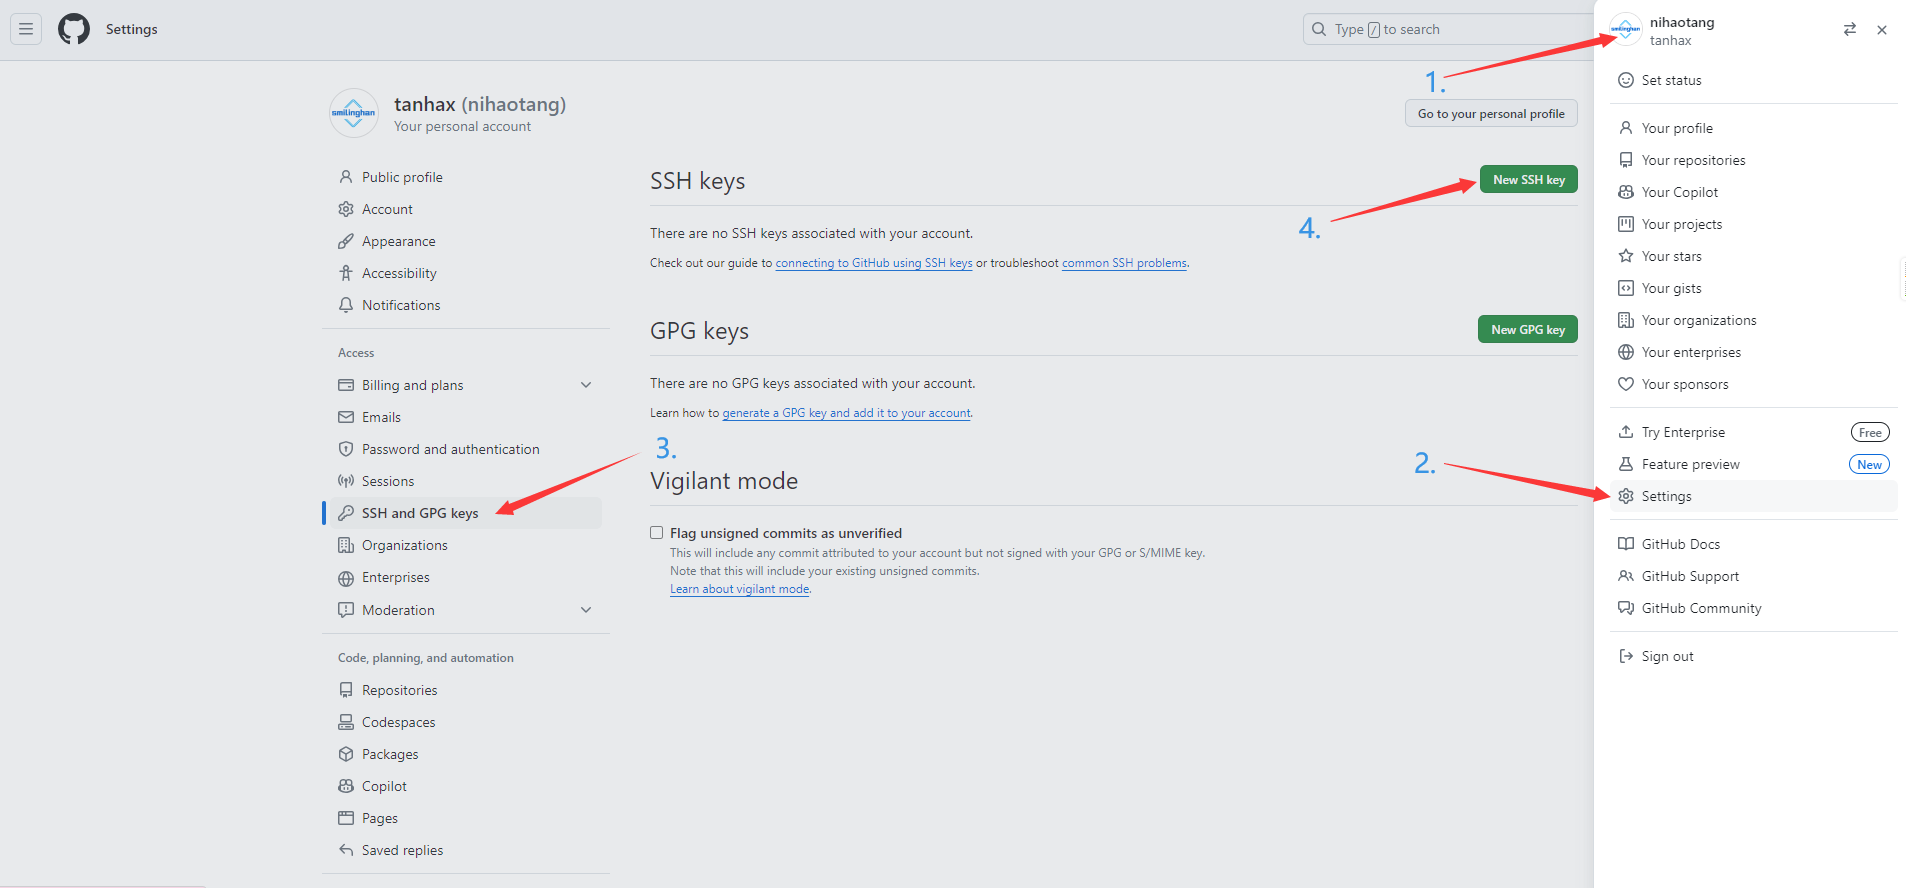
- 在 GitHub 添加 SSH 密钥(Title 可以随便取)。
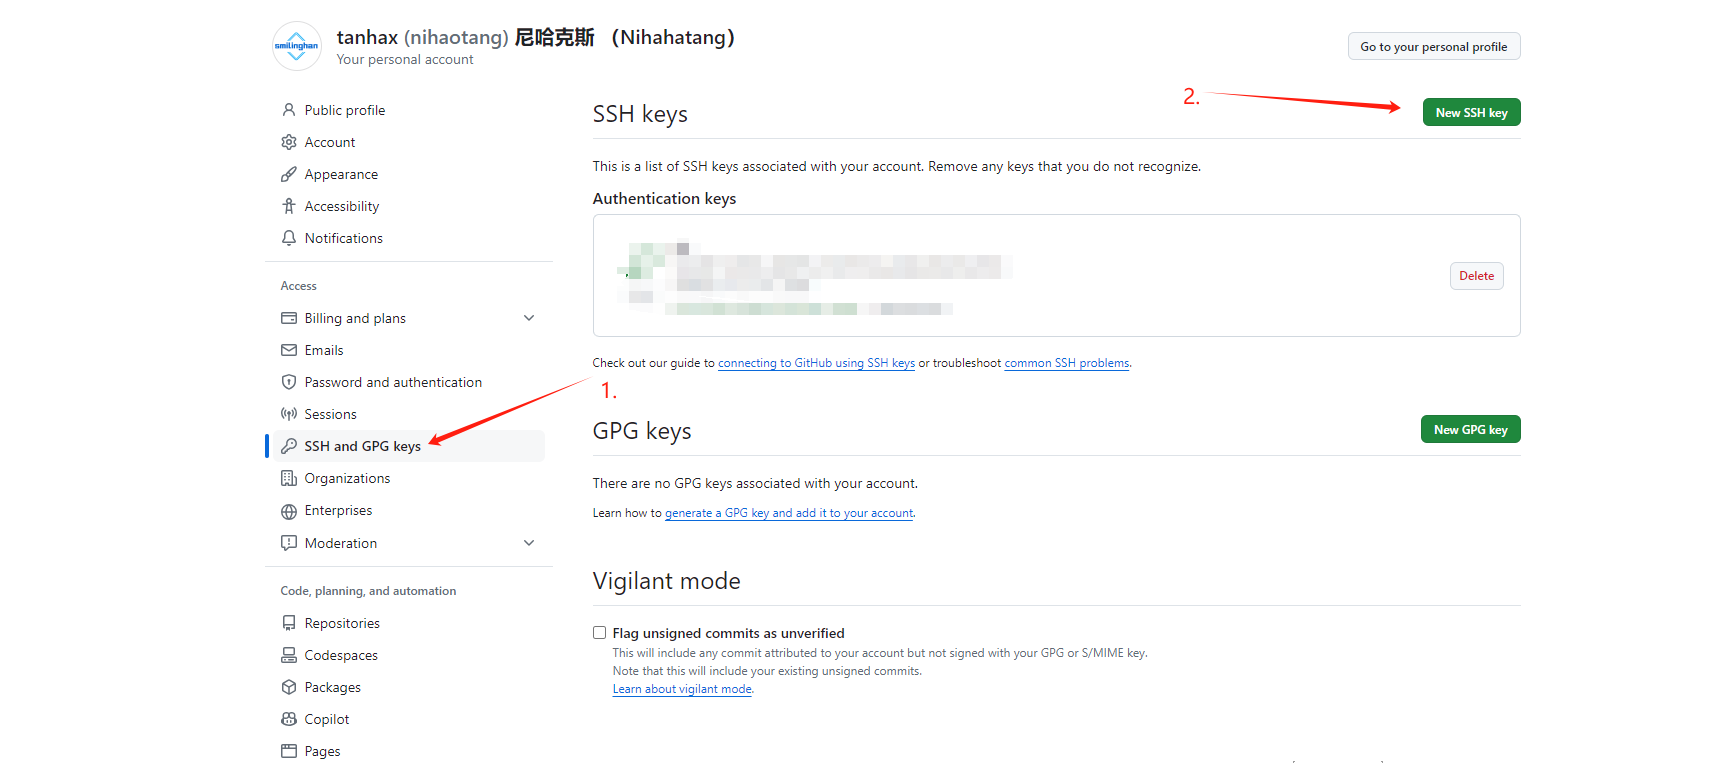
3.5 验证 Git 连接:
ssh -T git@github.com- 出现以下信息就证明成功连接了。

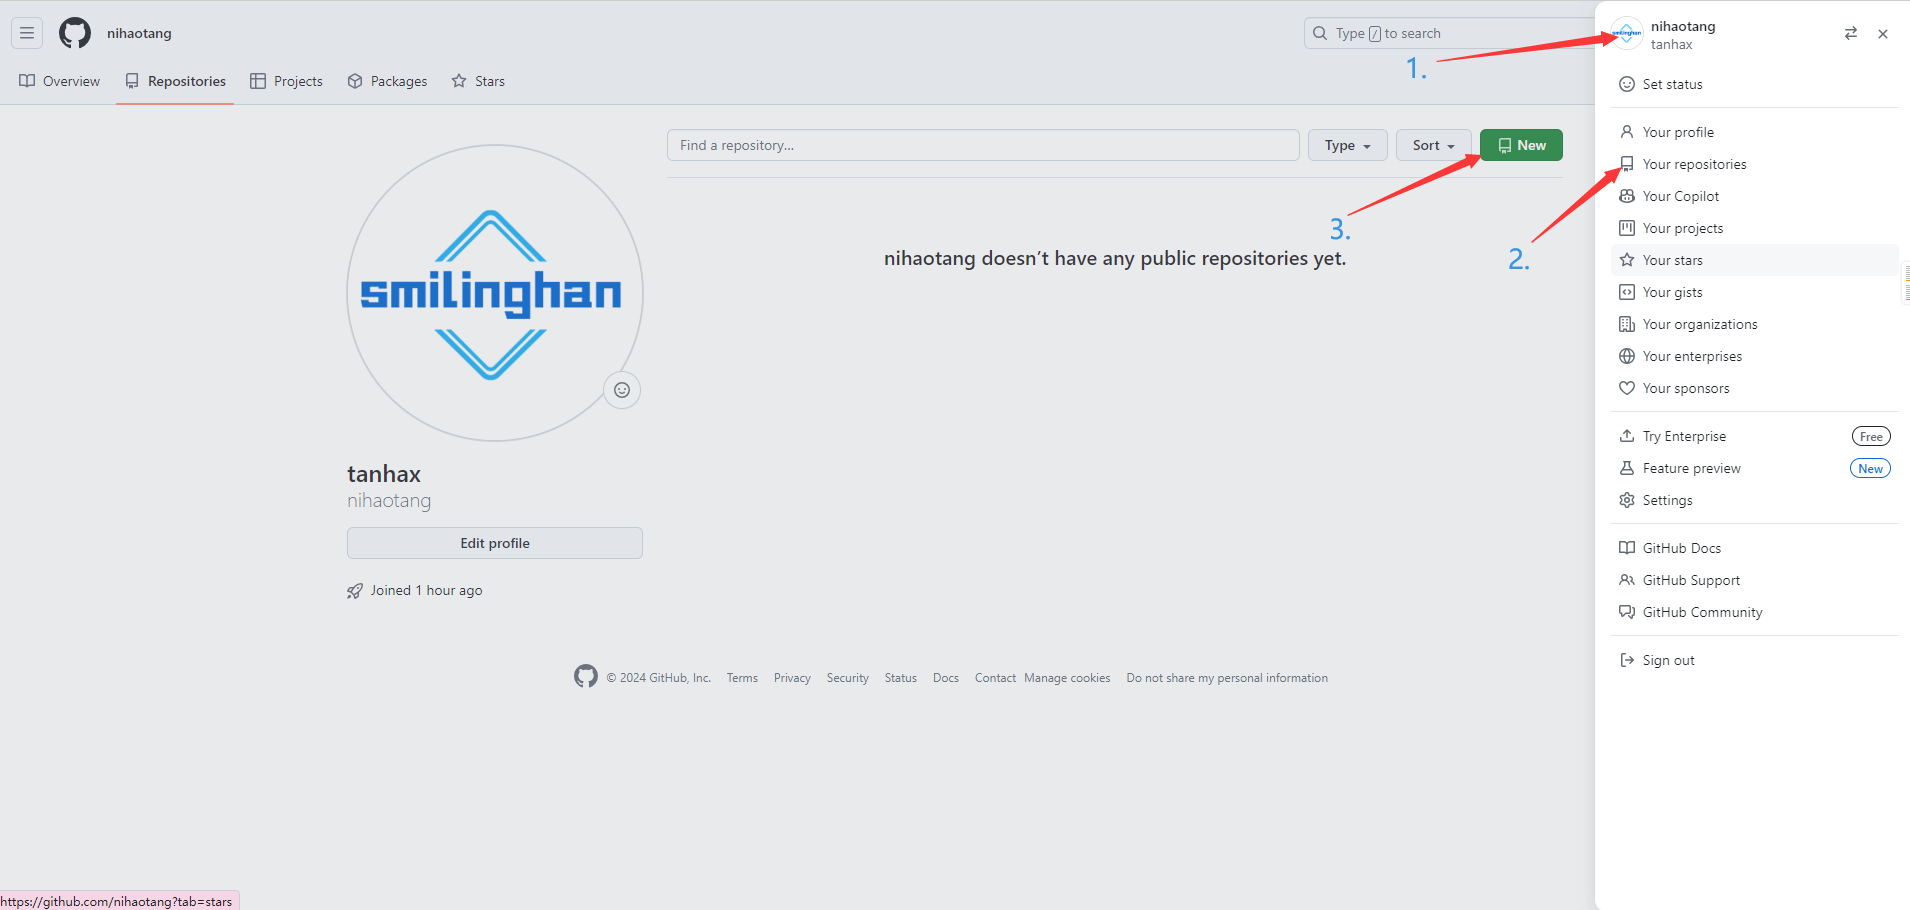
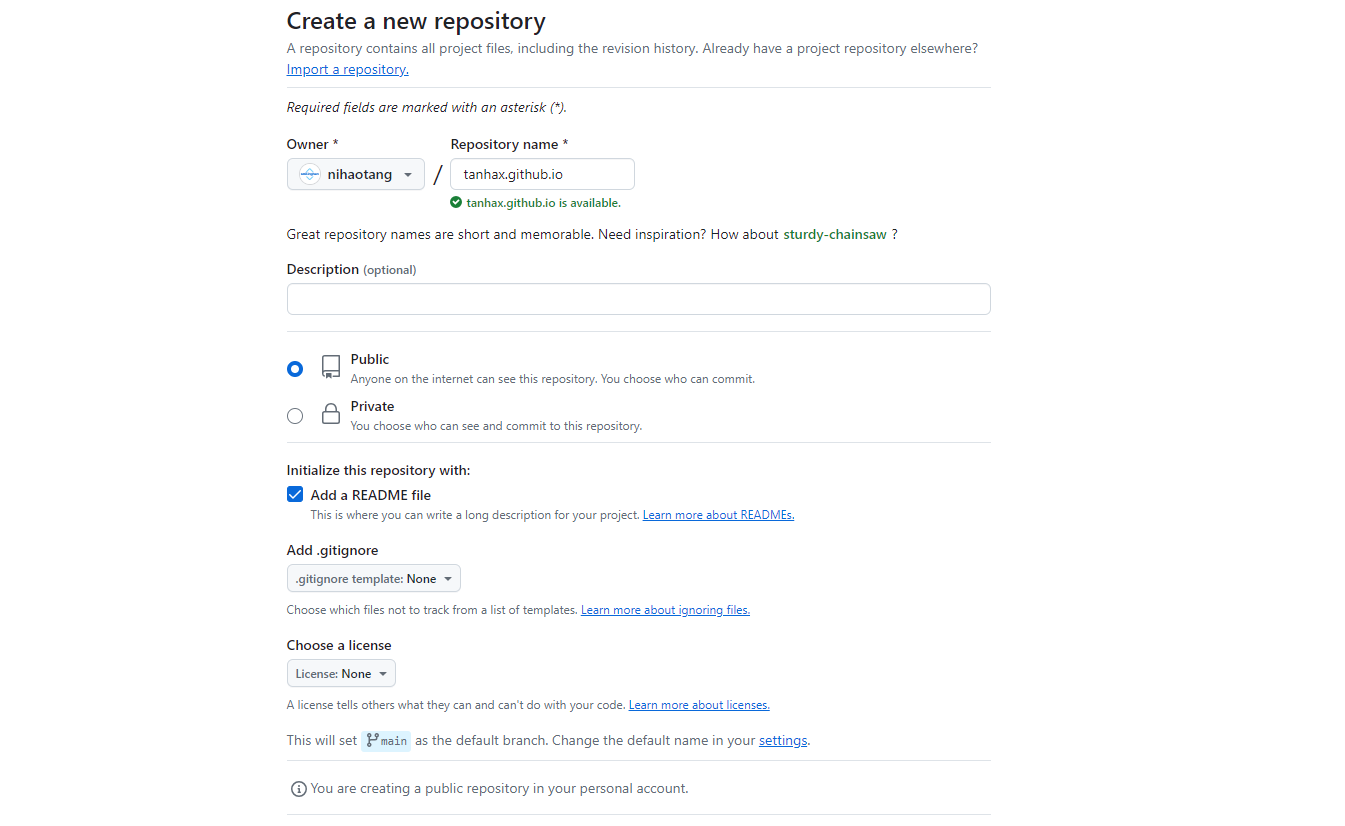
4. 创建 GitHub 项目
- Repository name 输入
用户名.github.io。 - 勾选 Add a README file。
- 点击 Create repository 创建仓库。
5. 本地安装 Hexo
- 在
hexo项目文件夹中右键,选择Open Git Bash Here。 - 使用 npm 安装 Hexo:
- 更多信息请访问 https://hexo.io/zh-cn/docs/setup。
npm install -g hexo-cli如果下载慢可以设置代理(注意端口)
git config --global http.proxy 127.0.0.1:1080
6. 初始化 Hexo
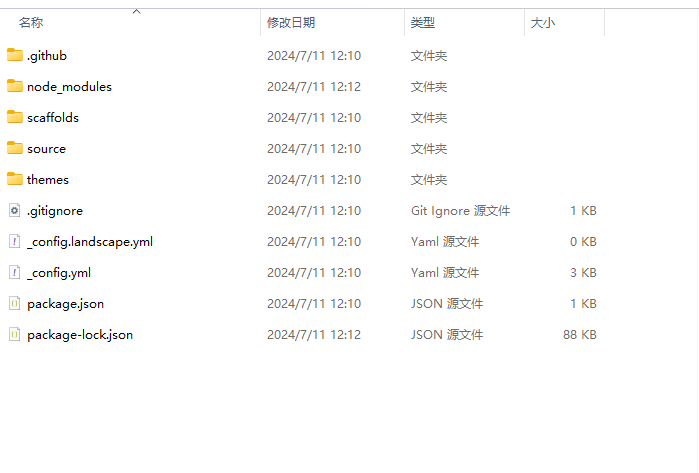
hexo init
npm install- 出现以下提示就以完成初始化了。

- 初始化完毕以后,我们可以看到 hexo 程序文件。
7. 预览效果
7.1 生成并预览 Hexo 网站
hexo g
hexo s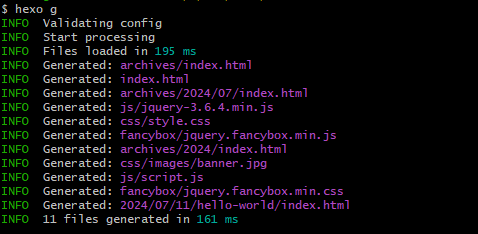

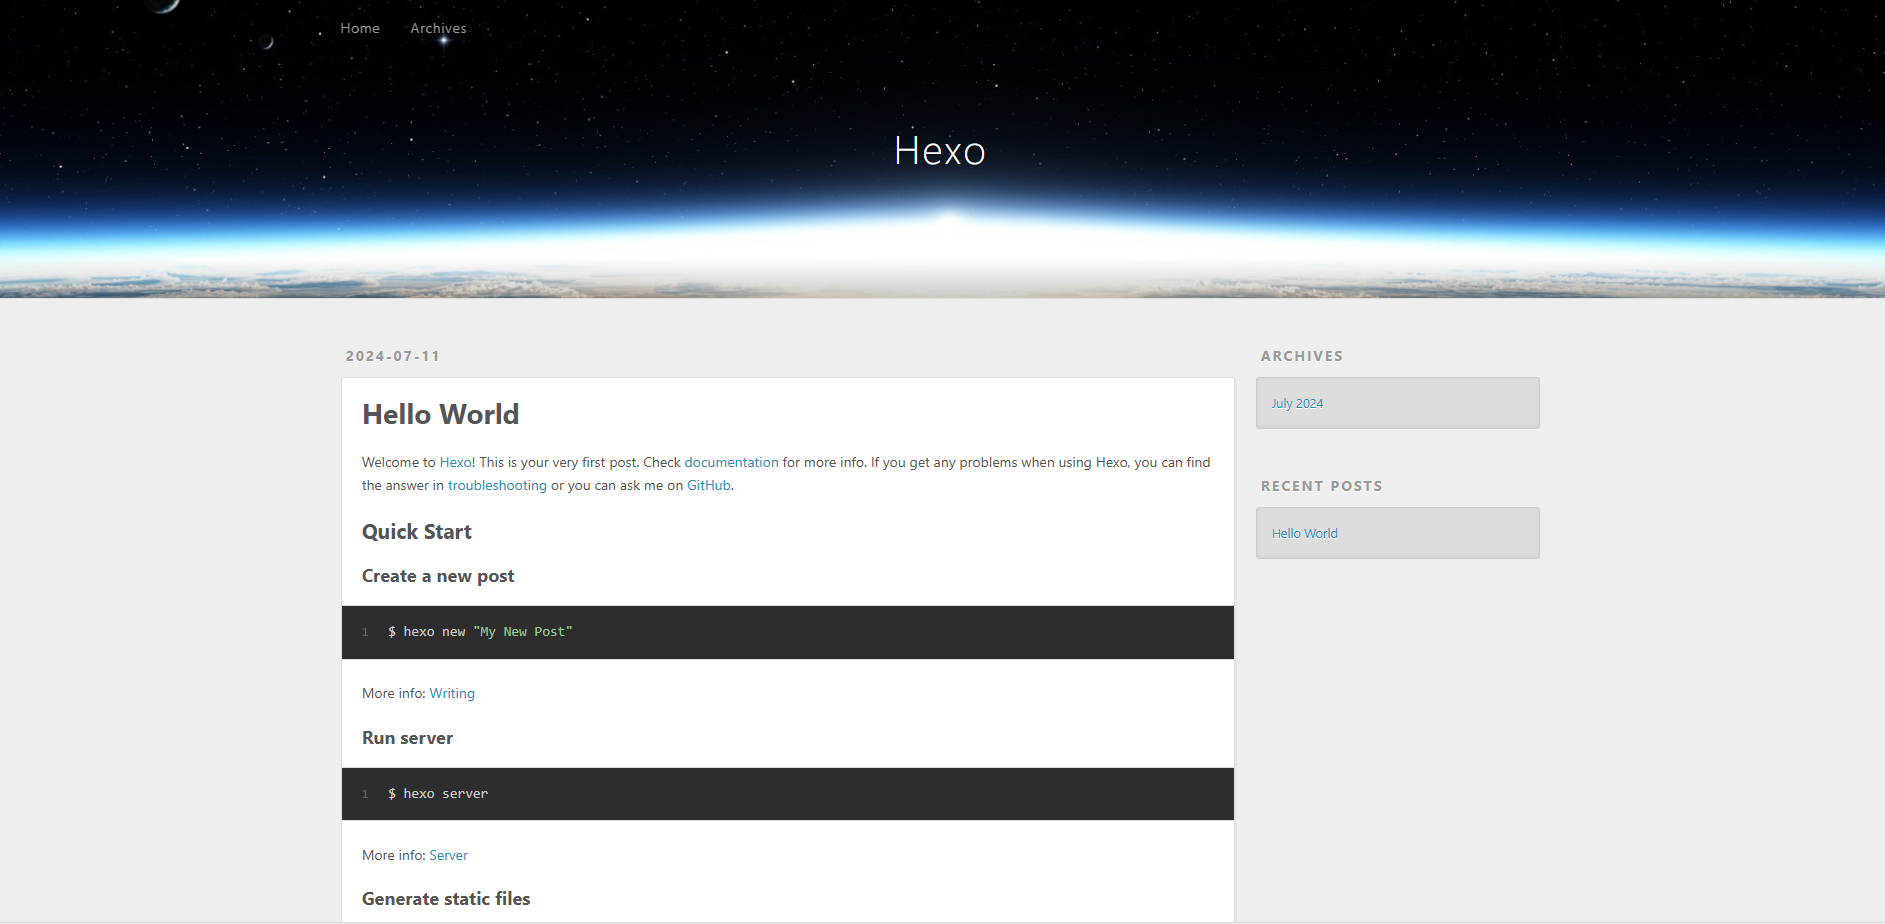
7.2 在浏览器打开 http://localhost:4000/ 查看效果。
8. 更换主题
- 在 Git Bash终端下 进入
themes目录,选择并安装喜欢的主题,如Chic主题:
cd themes
git clone -b master https://github.com/Chic/hexo-theme-Chic.git themes/Chic
9. 修改配置文件
- 进入主程序目录下的
_config.yml配置文件: - 填写
deploy模块:repository填写GitHub上复制的链接 - 更多信息请访问 https://hexo.io/zh-cn/docs/configuration/。
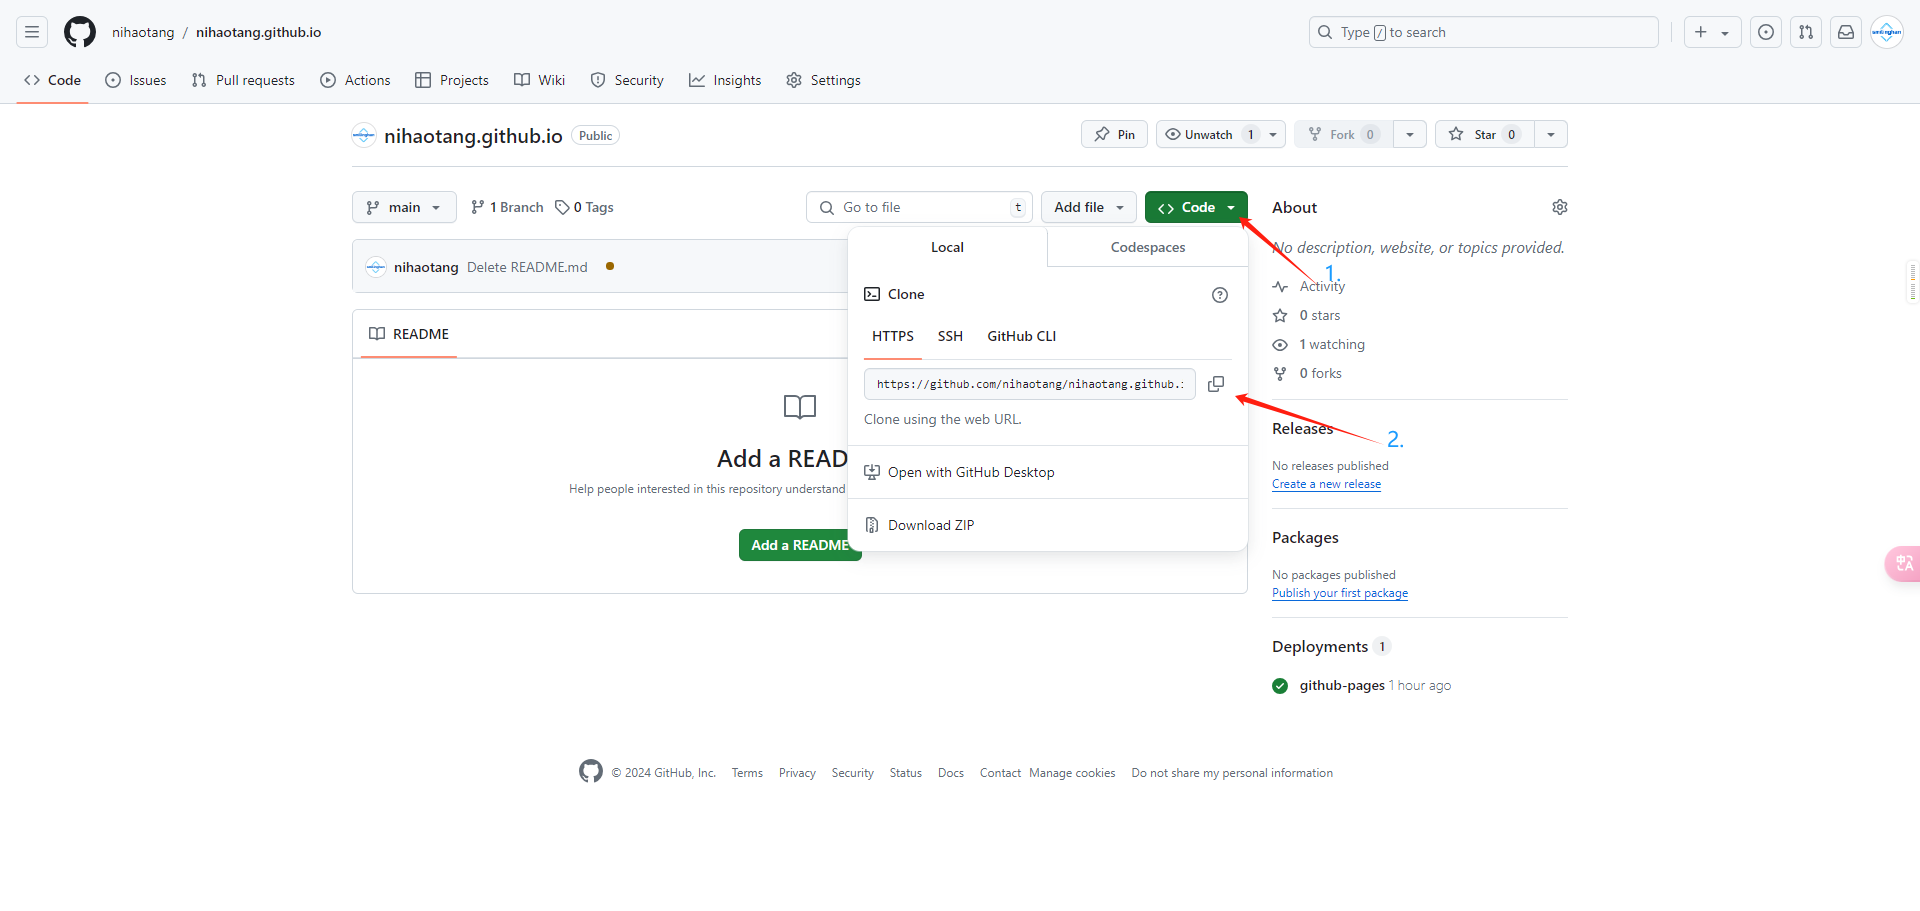

- 修改 theme 为自己需要使用的主题名称。

10. 部署博客至 GitHub
1. 安装 hexo-deployer-git 插件:
npm install hexo-deployer-git --save2. 清理 Hexo 生成的临时文件和缓存、生成静态文件、将生成的静态文件部署到指定的地方(根据 _config.yml 中配置的部署设置)。
hexo clean && hexo g && hexo d11. 此时就已经完成了部署
- 访问
用户名.github.io设置的域名


评论 (0)